Hopefully by now you will have developed some energy saving habits, as well as a understanding of how to carry on learning. After all it will be your own discoveries at the crag that will carry you above and beyond. Even a single pitch might require all of the skills outlined so far. The trick is to identify the different styles you will need to use – you need to be able to ‘read’ the route. To be adept at reading a route the skills and movements of climbing will already be subconscious. Your body needs to have used the movements hundreds of times before it starts to lay down subconscious muscle memory.
There are a couple of ways you can help: Think about climbing whenever you can! By thinking of the movement you are excercising some of the same brain functions as when you are actually climbing. By climbing as quickly as possible, quicker than you can think through the moves, you can exercise your subconscious skills.

Developing subconscious route reading exercise
Find a pitch that you should find relatively easy to climb and climb it as quickly as possible, the guide for how quickly should be the point at which you feel that you are making moves before you have had the time to really think about what you are doing. Yummy be using bad technique, so climb the pitch again slowly. Did one feel efficient? Did you find any of your instant decisions helped? Repeat this exercise often on both route you know and don’t know.
Guidebooks
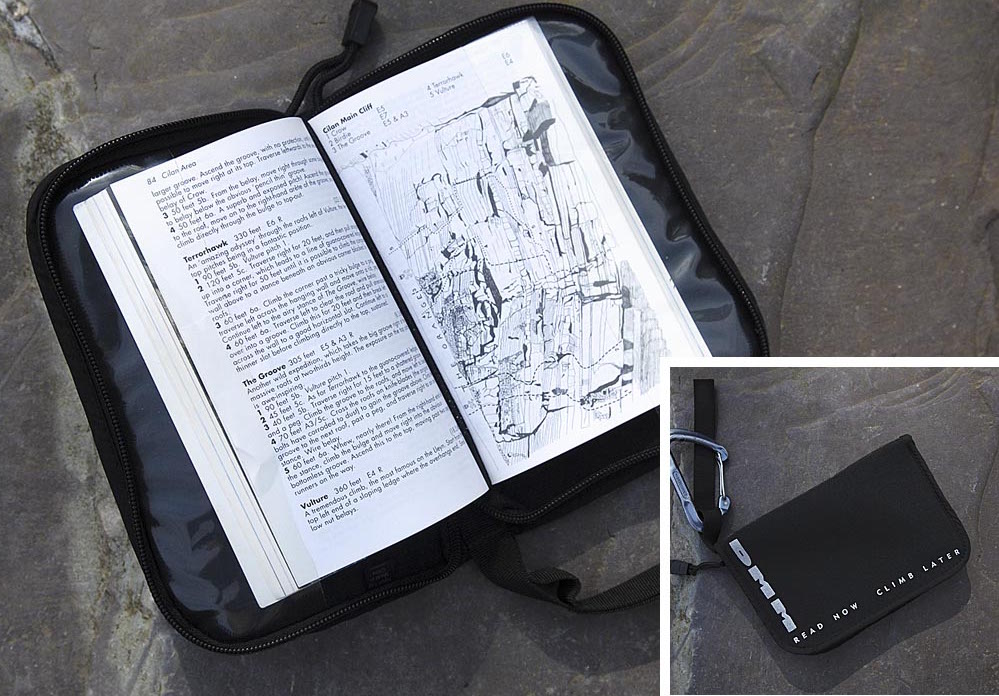
The ability to read routes is pointless if you can’t find the crag. Guidebooks are another essential tool; some are pictorial, others are more descriptive, all should help you find the crag, the start of the route and the climbing line.
Read the route description and carefully examine the topos. Try and identify key features and landmarks described in the book, and try and visualise the line of the route on the crag. On multi-pitched route this becomes increasingly difficult as part of the crag may well be obscured from view. At times it may be necessary to check the guidebook on the approach to the cliff as you often get a better overview of the route.
When people first start using guidebooks they often misinterpret the information, a slight groove becomes a corner, a crack becomes a chimney, etc. The trick is to constantly learn from you mistakes, (typically this can be trying to make the description of your chosen route fit the section of cliff you are stood below!).
Guidebook Exercise
When approaching the crag have the guidebook to hand. If you get a good view of the crag you can identify possible approaches to the bottom of the crag and work out the rough line of one or more of the routes on the crag. Which will all help you to arrive at the bottom of the route that you wish to climb.
At the bottom of the route read the description again and look at the topo. Your route may not be shown, but the lines of the routes to either side might. Visualise the line of the climb. It can be helpful to ask other climbers around what routes they are climbing but they may be just as lost as you!
Find the right start of a route is a great start, as it means the rest should fall into place, sometimes it can seem rather ambiguous.
If you are setting up a top rope you need to identify features at the top of the crag that will help you find the top of the route. Or alternatively place some rucksacks or a climbing partner just out from the base as a reference point to locate the appropriate place to rig your ropes.
When climbing the route let the belayer have the guidebook and keep it open on the right page, and if you get confused get them to direct you, as they often have a better view of the bigger picture.
Once you have finished the route, try re-writing the description in your own words. Does the guidebook use different words to describe the features and different phrases to describe the climbing?

Reading Routes
Talk to other climbers, they might be able to tell you where they found the going tough or where they found a crucial gear placement. They may also be able draw comparisons with other routes that you have climbed. Use the internet as someone may have written about there experiences, maybe they got lost and have key piece of information to share.
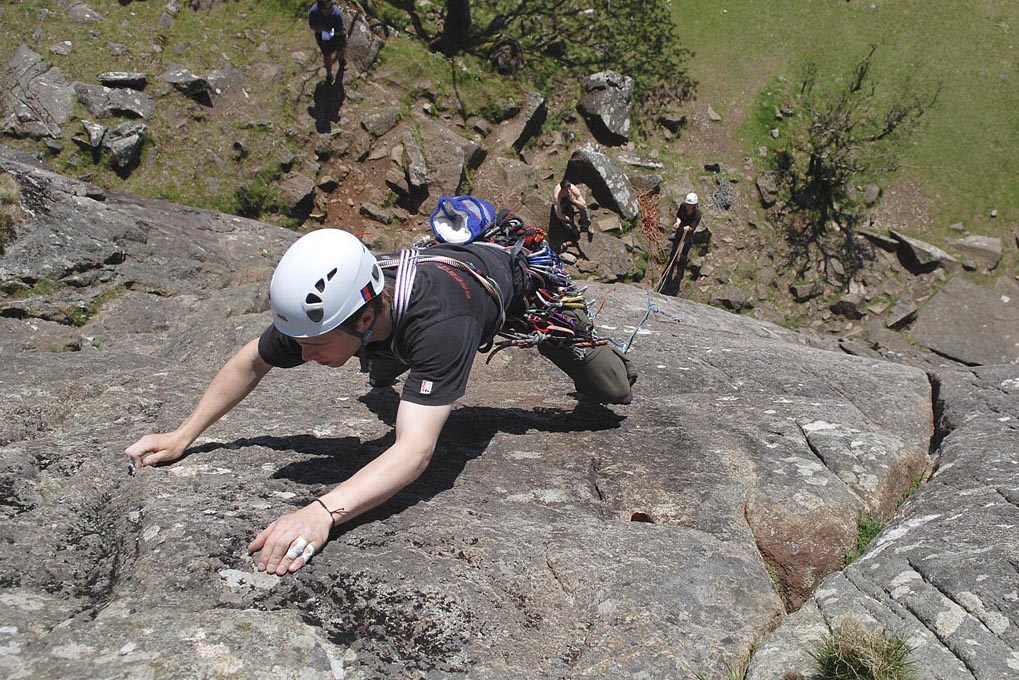
As you approach the route and can see the whole thing, identify any features or landmarks that may help you to navigate your way to the top. Look for any obvious rests or gear placements. Binoculars may be useful to examine the route from below, or you may get a better view by climbing an easier adjacent route. On a single pitch climb it may be possible to walk round to the top. The more angles you view the climb from the better the three dimensional image of the route you will have.
Identifying the type of terrain and how best to climb is at the heart of reading a route. It comes down to breaking a route down into sections, ideally in between obvious rests. Think about what skills you are likely to need and visualise yourself climbing particular moves. As you do this at the base of the route you are switching your brain to climbing mode.
You need to continue to read the route as you climb; not only to follow the line but also to react to the terrain and climb using appropriate technique.
Reading routes exercise
Look up at a route from the ground and try to identify the skills you may need, where the rests are, where the crux moves are, what kind of belay awaits at the top of the pitch and so on. Now climb the route and see if your expectations were right. Take a photocopy of the topo and mark down your thoughts or write them on a piece of notepaper before you climb, so you can review them afterwards. Were you drastically wrong anywhere? If so where? What made you wrong? How could you improve your eye for judging routes?
Try this on every route you climb, you don’t always have to take notes. The more your route reading develops the closer to the getting things 100% right you will become … although it is unlikely you will ever be totally right!
Reading routes tips
- Visualisation is key; you might imagine seeing a line on the rock, hearing yourself talk through the route or recall a written set of instructions.
- Your plan may be wrong, the skill of reading a route whilst climbing is just as important.
- Use rests on the route to look at the next section, re-formulate your plan and identify the next rest
- Real hands on experience of using guidebooks and looking at climbs is required to develop this skill. Learn from your mistakes!
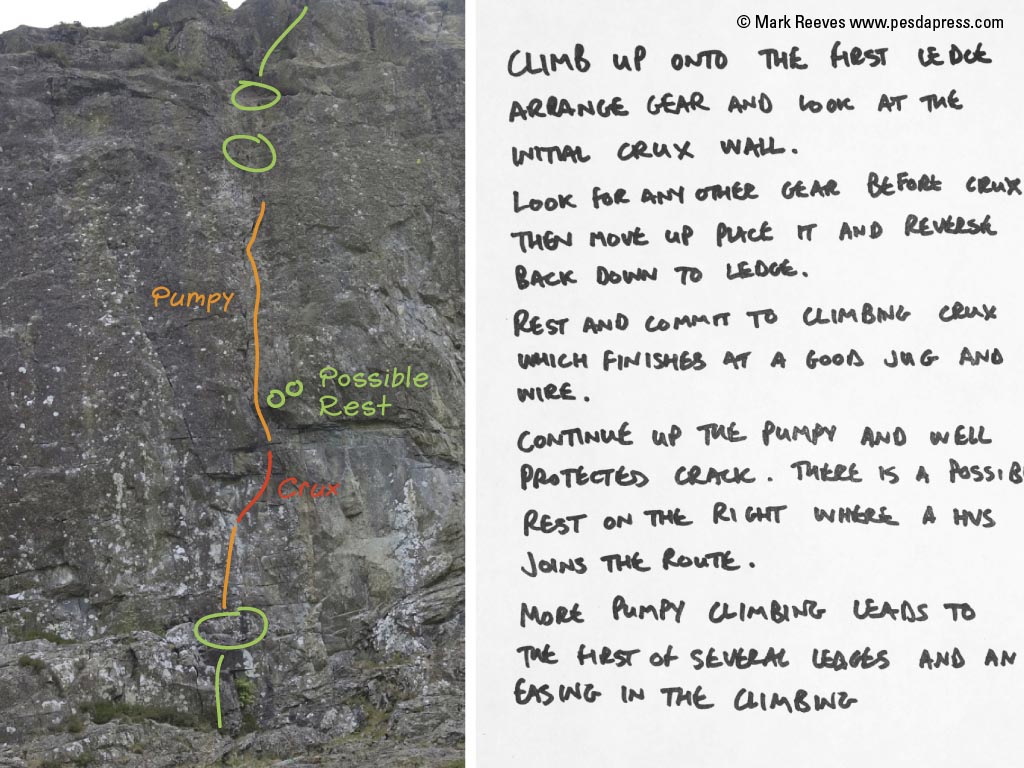
Colour coding your route
How you colour in a route will be a personal thing, green climbing for most will be very easy, usually with a good spattering of ledges to rest on.
Yellow would be for the blanker sections where the holds are smaller, and the rests are further apart. Most of the moves will require a degree of thinking but the rests, climbing and angle of the route will mean that you shouldn’t feel like you are getting pumped.
Red is the steep and harder section, maybe just a single move, roof or bulge in the rock. It will be to hard to hang about on these sections and they will require a sense of urgency or power to overcome. Identify a place to rest and/or place gear after them, so that you have a point to aim for and no feeling of desperation through the moves.
Visualisation exercise
Draw your route on paper using a colour scheme to to indicate different climbing styles; green circle = rest, green = easy, yellow = Requires a little thought but is not that pumpy, red = hard climbing requiring power, speed and technique (the hardest moves you are capable of and you will become pumped).
Try to visualise your colour coded route on the rock and use this plan to climb the route.
Were there any differences in between the plan and the execution? If so did you spot the problem before, during or after you had to climb that section of the route and could you have spotted the problem earlier?
Visualisation tips
- Some people might nd this visualisation technique more useful than a written description.
- Try and see your body making the moves. You mat see yourself from a third person viewpoint (like a movie) or through your own eyes from a rst person viewpoint (if this is the case try and feel the moves as well).
- By thinking of the moves you are engaging your pre-motor cortex, and turning your mind on to climbing mode.
Lead Climbing Coaching Course
Our sister site snowdonia mountain guides runs lead climb coaching course that are specifically aimed at getting you to a higher level in all aspects of climbing. The ability to use a guidebook and read a route is at the heart of efficient climbing.
We use a very simple approach when it comes to route reading and breaking a route down in bite size chunks. We believe this is some important that within a day we can often improve some’s approach to climbing and within two days increase the climbers grade.
Alternatively maybe consider a How To Climb Harder Course.
eMail us to find out more.