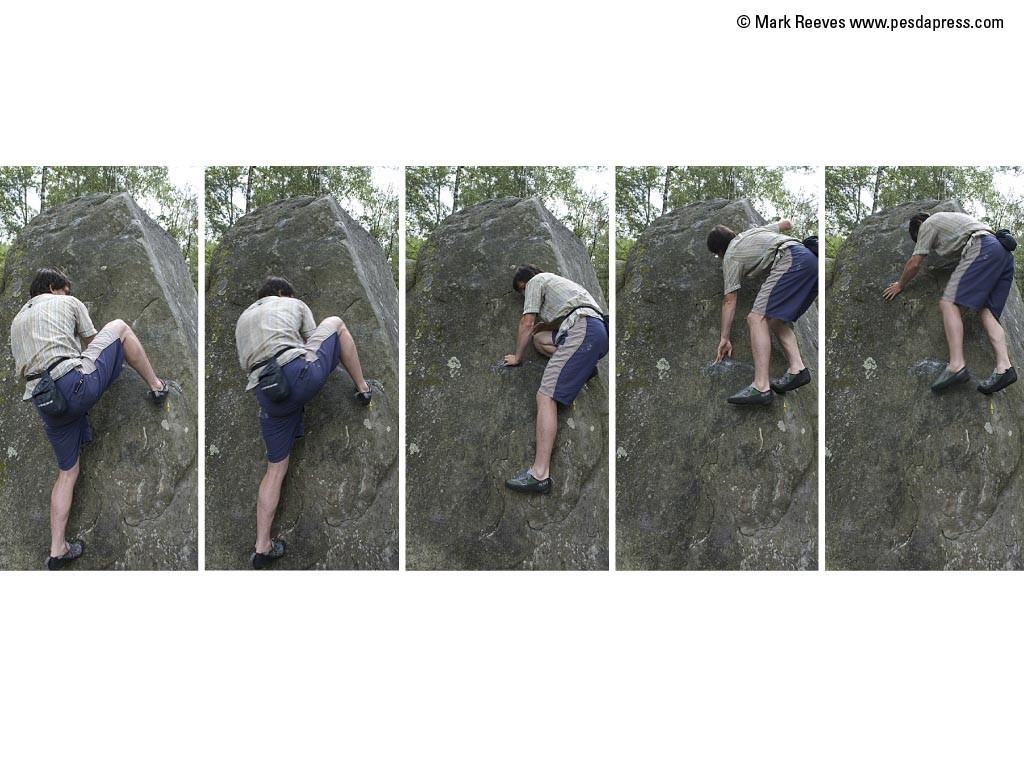
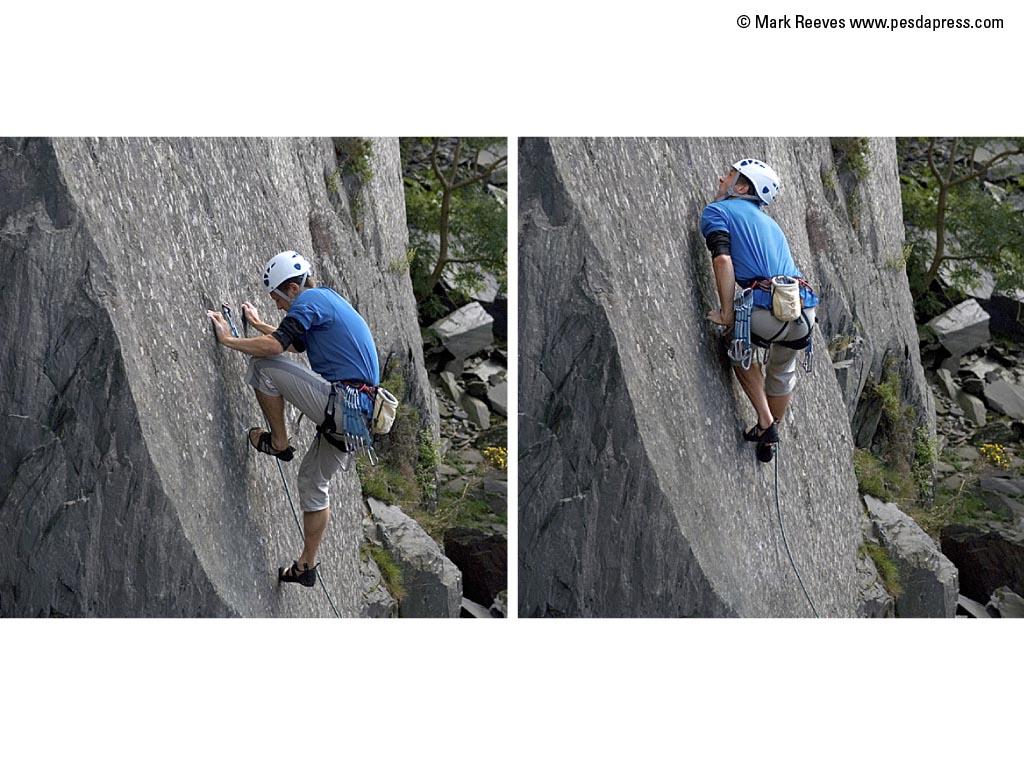
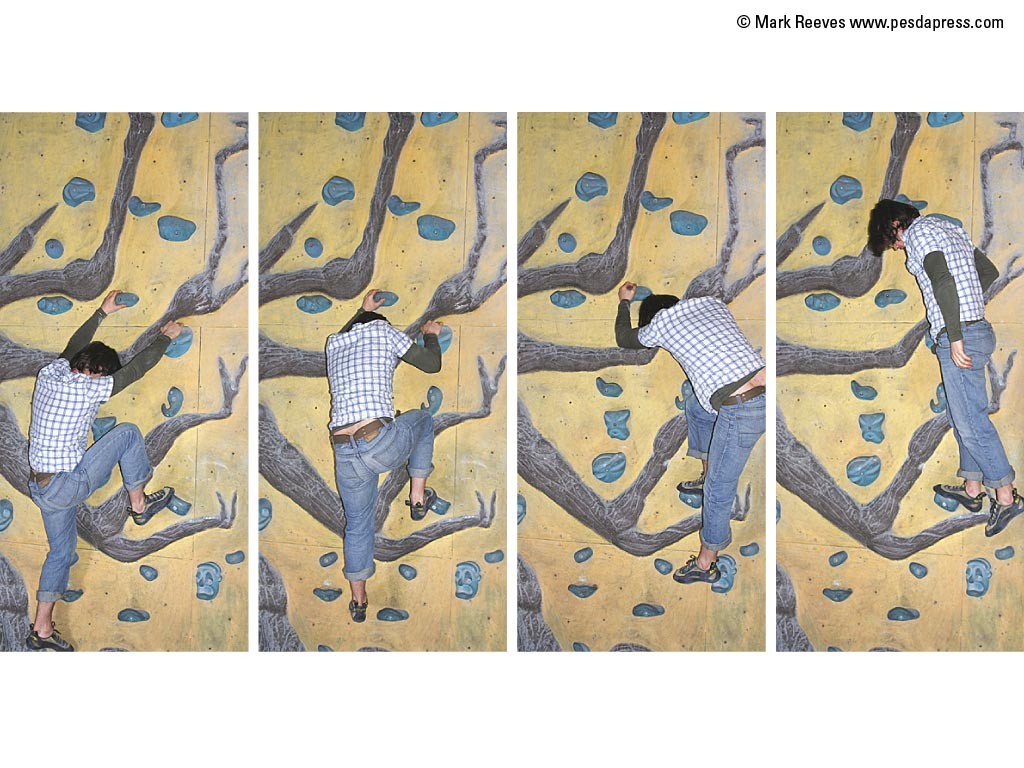
Although similar to the rock-over as it essentially involves the transfer of weight from one foot to the other. Its difference comes from pivoting during the movement phase so that you arrive at the next point of balance on your outside edge, which as we have learnt from earlier exercises is more efficient. This keeps your hips and centre of gravity as close to the rock as possible, reducing the leverage onto you hands as you lean back.
Stand on the oor and raise your foot onto a hold using the inside edge of your boot. Use handholds for balance and rock-over. As you reach the point of balance pivot around on your foot to end up on the outside edge of your boot to nish.
Then try the pivot during the rock-over rather than at the end of the move-ment. Pivot round on the higher foot as you move up to arrive at the new point of balance on the outside edge of your boot.
Link a series of movements from foot to foot, concentrating on putting the twist in as you rock-over and arriving at the point of balance on the outside edge of your boot.
Compare this corkscrew rock-over to a standard rock-over, which feels easier? How do they compare on short distances and at the limit of your stretch? Short step or high step? Which type is easier on slabs, vertical walls or overhangs?
Pick a foothold directly above the lower hold and then a hold way out to the side. Try moving the pivot to before, during and after the rock-over. Does one need a stronger grip with your hands?

The rule of opposites
A standard rock-over tends to make us move left and right as we step up, whereas a corkscrew rock-over or a step through can help us to go directly up. Stepping across the centre line of your body and trying to stay sideways uses opposing left and right limbs.
So the rule is: The upper body uses the opposite limb to the lower body (left hand, right foot – right hand, left foot). Combined this with facing towards the hand you are using at the time.
Using the rule of opposites: Stepping up onto the outside edge of the left rock boot, and using mainly the right hand to layaway, and left hand to press down.
Rule of opposites exercises
Use only opposite limbs left hand – right foot and vice versa..
Emphasise the direction that you are facing, if you are pulling on your right hand then face to the right.
Now try making the pivot before you rock over so that you are always rock- ing over onto the outside edge of your foot. This will help keep your centre of gravity closer to the wall, reducing the leverage on your hands.
You may find that if the step is too high you will have to do the twist during the rock-over.
Experiment with higher and higher steps, reaching them using sidepulls.
How does the rule of opposite feel? Easier or harder when stepping through? Is there a height of step when stepping through that it is easier to twist before, during or after the rock-over?
Cork screw rockover/rule of opposites tips
- Move fluidly, carried by momentum, between one foot and the other.
- The pivot can happen before, during or after the movement. Experiment with what feels better when doing short or long steps, stepping out to the side or into the centre.
- When you pivot before the movement you will back step onto the hold.
- Use opposite limbs.
- Face the right direction.

