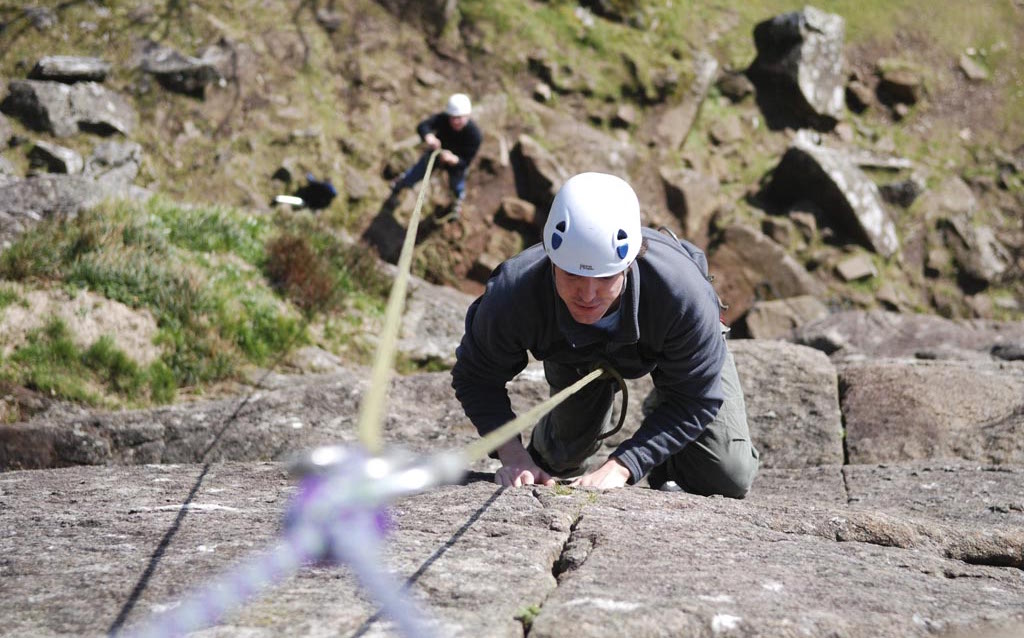
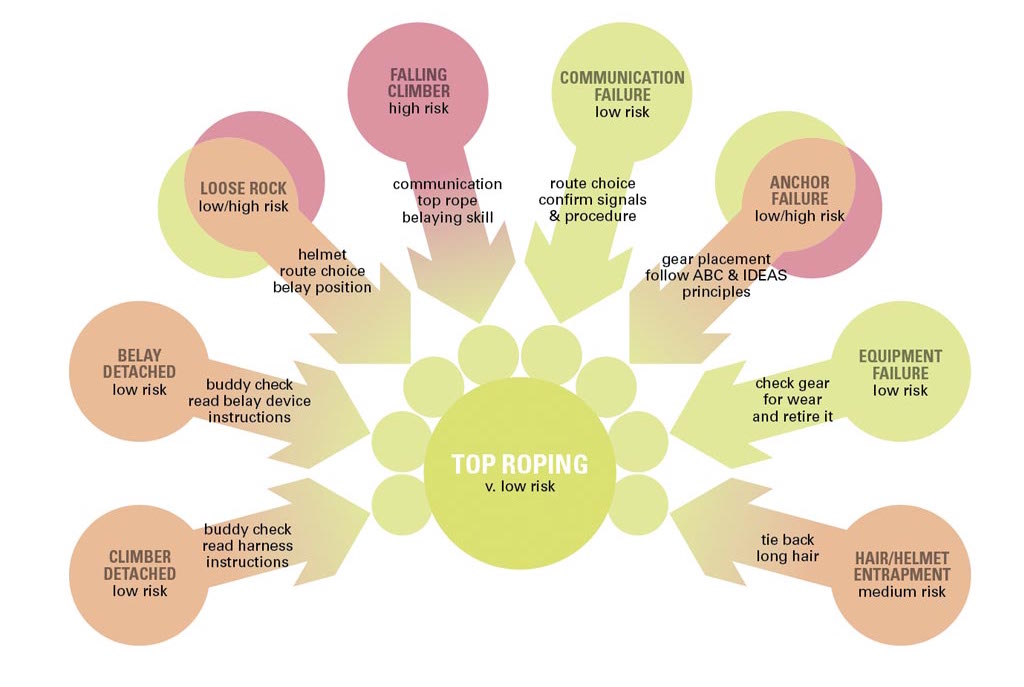
Top roping (or bottom roping) is how most people start out climbing and, in the context of this site, one of the most appropriate ways to repeat the exercises in safety. If done properly, it should be an very low risk activity. There are however several fundamental principles that you can learn whilst making basic belays for top roping, that are carried through to lead climbing.
The safe rigging of basic belays for a top or bottom rope requires you to consider some fundamental principles as well as ways to avoid problems. These principles apply right through to the more advanced belays you will come across on multi-pitch climbs.
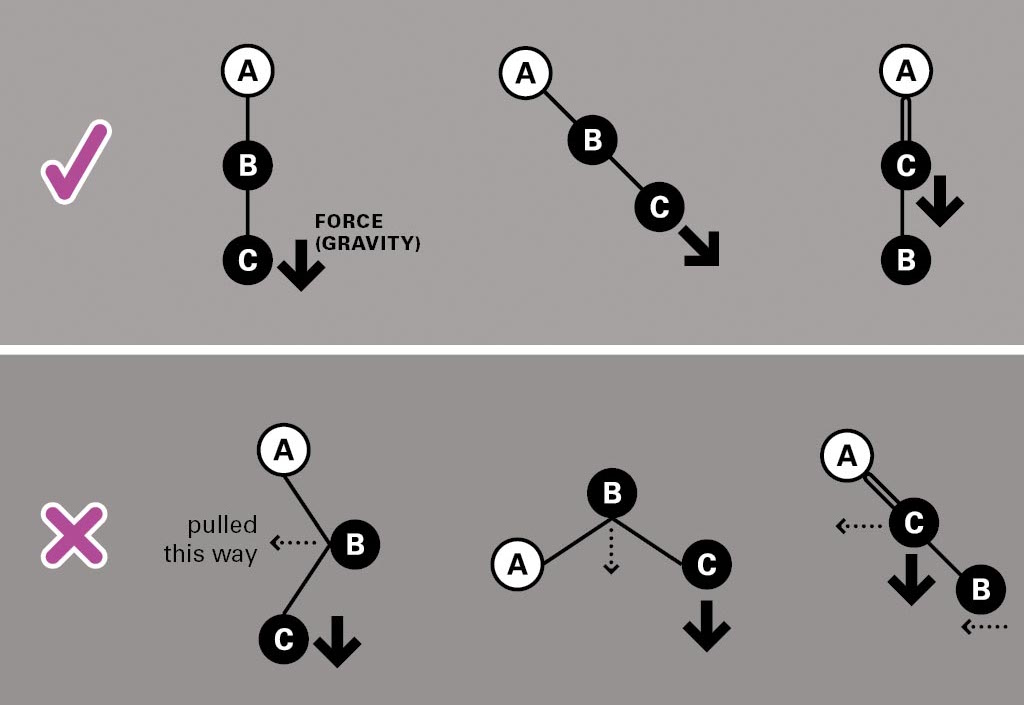
The ABC of Basic Belays
The rst step when rigging top ropes is your ABC; Anchors, Belay and Climber. To keep the forces in-line with gravity all three should be in-line to prevent either the belay, belayer or the climber being pulled sideways across the cliff. If the belay is pulled across the cliff edge it may result in damage to the rope and/or unequal loads on the anchors, and if it occurs repeatedly or on a sharp edge it may well cut through the ropes (catastrophic failure!)
The IDEAS Principle of Basic Belays
The second acronym, which will help to guide you whilst building a safe and basic belay is IDEAS:
- Independent
- Directional
- Equalised
- Angles
- Solid
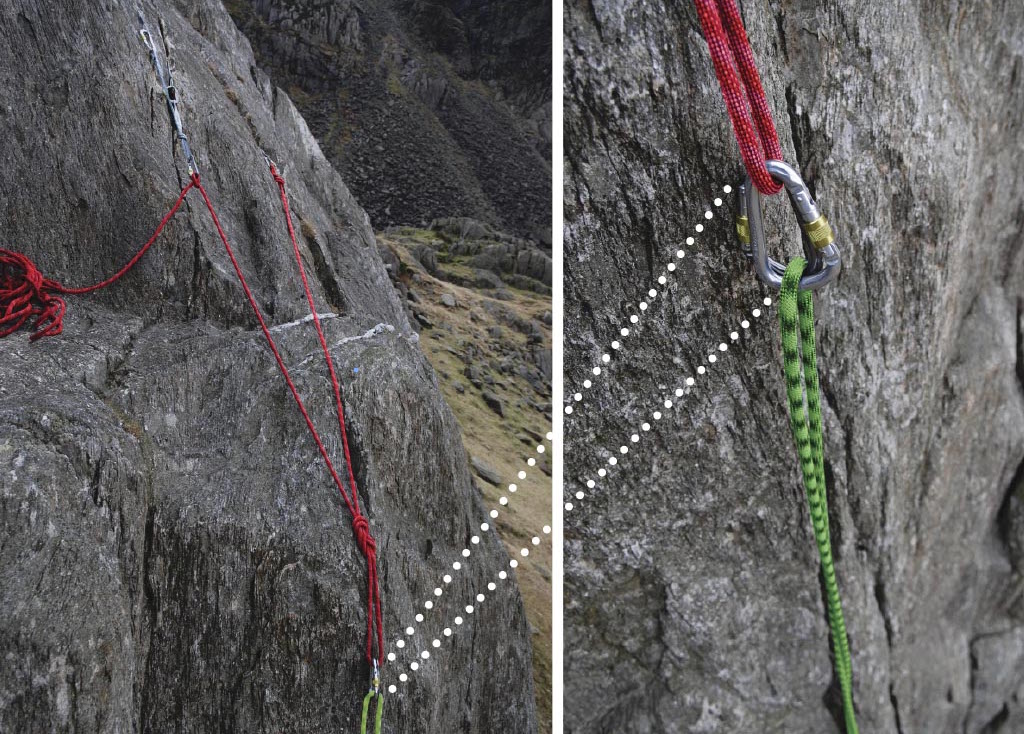
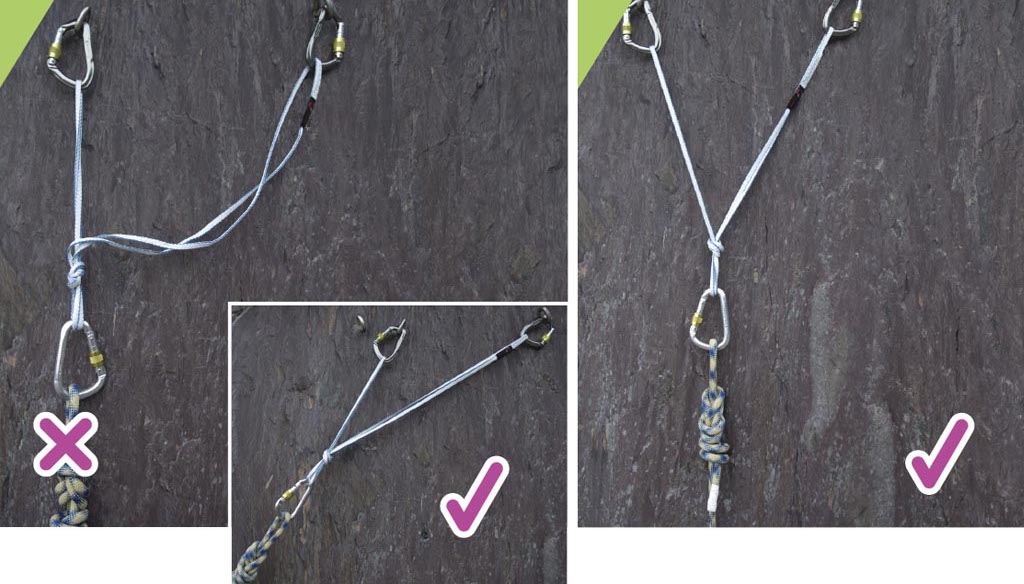
Independent – each of the anchors should connect separately to the belay so if one anchor fails the other(s) won’t be shock loaded. This is an important principle to follow throughout the system when linking of anchors with either slings or rope to make basic belays.


Directional – the anchors, belay and rope should be placed ready to take a load in the direction that any force on the belay will occur. In a top rope this will typically be towards the cliff edge and directly down. If the anchors are pulled in the wrong direction, they may not withstand the load.
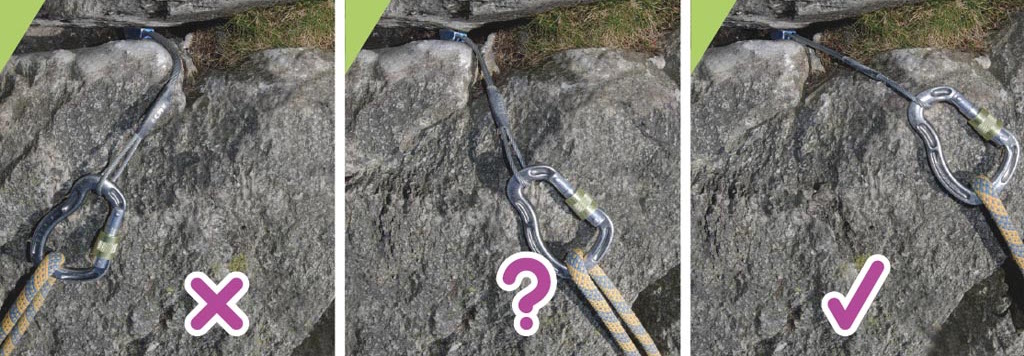
Equalised – any link between your anchors should be under equal tension when loaded in the direction that will result from a fall. Done well, this will share the load equally between the anchors and reduce the chance of anchor failure, and also help to prevent a shock load should one of your anchors fail.
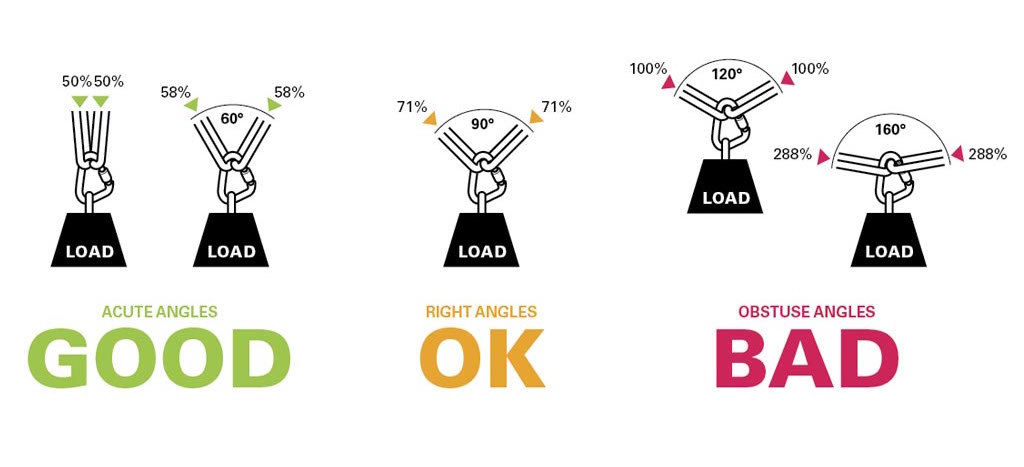
Angles – the angle between the two outside anchors should be kept to a minimum. The smaller the angle the better the force is shared. An acute (narrow) angle is good, a right-angle is alright and an obtuse (wide) angle is bad. Under 60° the load is shared roughly 50% onto each anchor, by 90° the load is shared at 70% of the overall load, whilst over 120° the load exerted on each anchor is 100% or more of the overall load (so there is little point having two anchors over 120° apart). So in practice our anchors are linked with rope or slings the greatest angle between anchors should not exceed 90°.
Solid – reliable anchors are the key to any basic belay. Check the rock surrounding your placements to ensure that the rock is not hollow or loose. Tap the rock with a karabiner and if it sounds hollow look elsewhere. The placements you choose should be as good as possible.

Another Alternative that americans use is EARNEST.
- E – Equalized – Anchors should be constructed so that each component of the anchor carries an equal amount of the load.
- A – Angles – Are the angles to wide?
- R – Redundant – Anchors should consist of multiple components in case one or more components were to fail.
- NE – No Extension – Anchors should be built so that if one or more of the components fail the remaining components won’t be shock loaded.
- S – Strong (or Solid) – The stronger the better.
- T – Timely – Anchors should be as simple and timely as possible without giving up any of the other ERNEST qualities.

Intro To Trad Climbing Course
Our intro to trad climbing course are a great way to get to know loads about basic trad belays. You’ll also get a load of chance to make them yourself under the watchful eye of our coaches, before you belay off them.
We will also teach you all you need to know to leave the course ready to trad lead climb on your own.
eMail us to find out more.