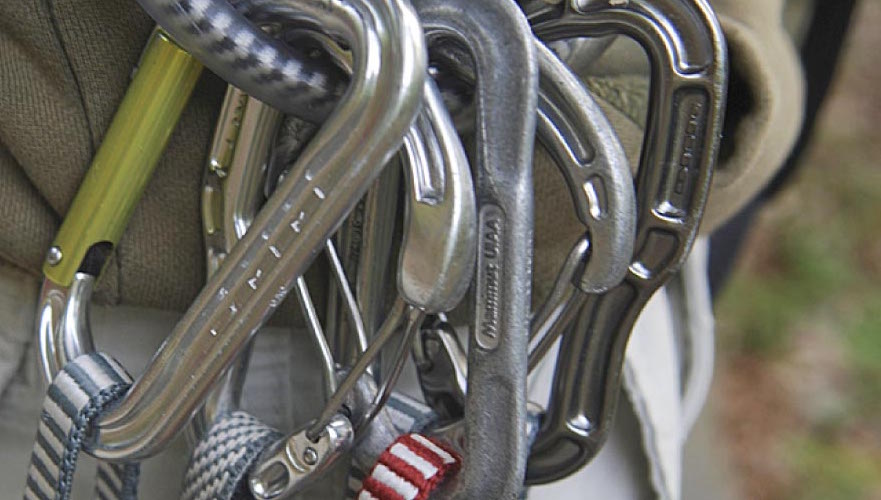
Using your rack efficiently is down to dexterity, remaining calm and staying organised. Know what you are carrying, where it is and make sure that when you take something from you rack you return it to the same place. The consequence of a messy rack is wasted time and energy spent looking for the small wires or large hex’s. Racking up well for trad climbing will save you time and heartache in the long run.
The first decision you have to make is, gates in or gates out, either all the gates of the karabiners on your gear loops facing into your body or away. There is no right or wrong way, just one way or the other, not both.
The next problem is what to rack where and, for that matter, what to take with you? Again there is no right answer, but there are a few wrong ones. Your personal preference will quickly fall into place but experimenting with new ideas is helpful, especially on those rainy days when you’re stuck at home itching to get out.
Racking up top tips

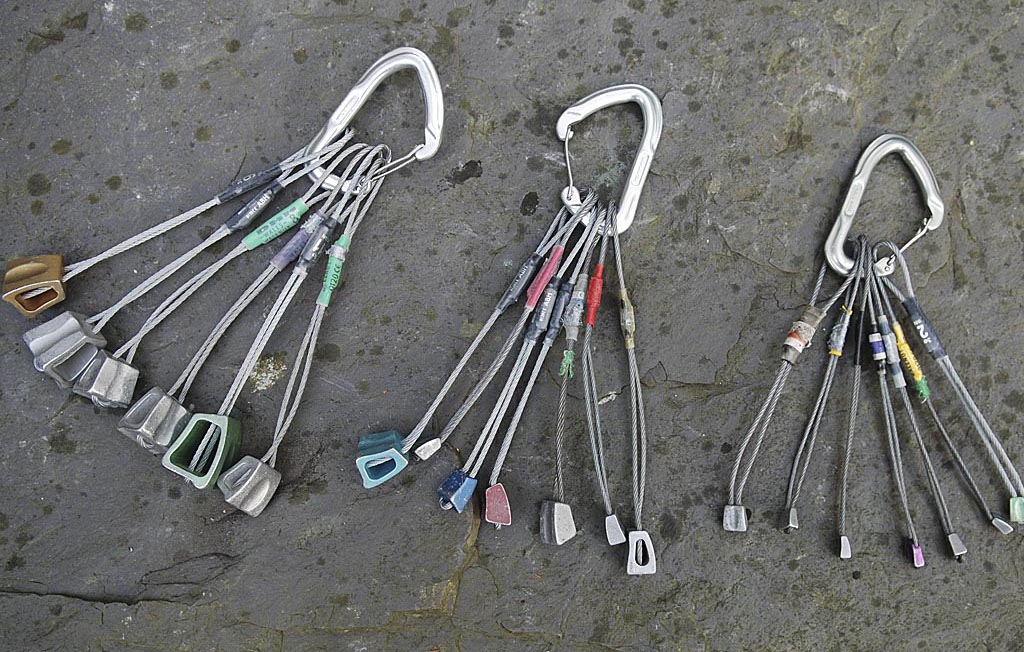
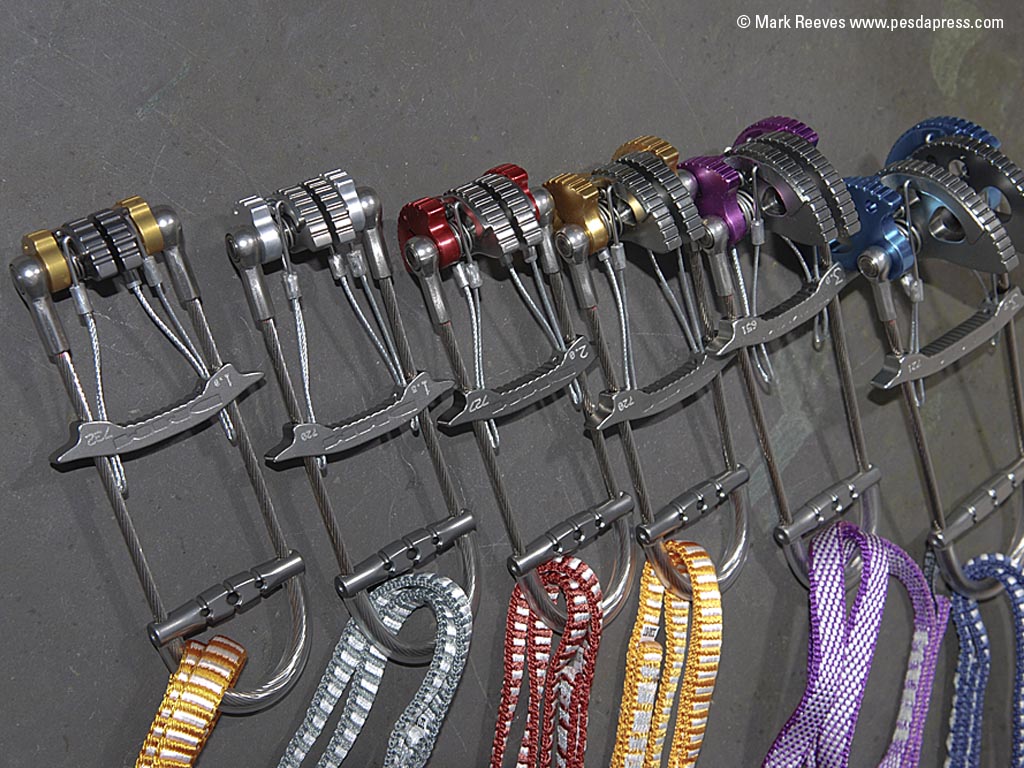
2- Racking up for long and more complex routes with gear arrange small on the left and large on the right.
3 – The same rack as 2 but with the gear arrange wires on the left and cams on the right.
Wires (nuts or rocks)
Everybody has a different idea as to how many wires to take on a route. If you are climbing on a gritstone edge then the chances are you will be able to make a reasonable guess as to the sizes you’ll need and which it might be prudent to double up on. On longer and multi-pitch routes it is better to double up on all sizes of wires and rack them accordingly, as you will not be able to see the whole route and may need a greater selection of gear.
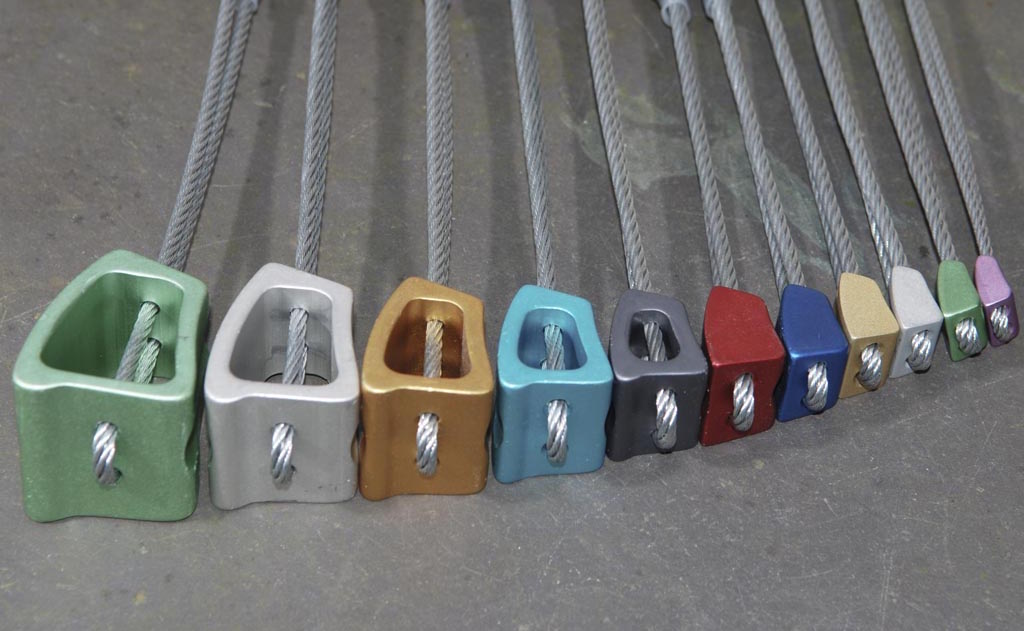
How to rack even ten wires is a problem, as even this is too many for a single karabiner. To rack twenty, break them down into sets of small, medium and large with between 6 and 8 wires on each karabiner. It’s best to have a small overlap in the sets; so if you were going to have a doubled up rack of wires from 1 to 10, one way to break them down would be:
- Small – size 1 x 2, size 2 x 2, size 3 x 2, size 4 x 1
- Medium – size 4 x 1, size 5 x 2, size 6 x 2, size 7 x 1
- Large – size 7 x 1, size 8 x 2, size 9 x 2, size 10 x 2
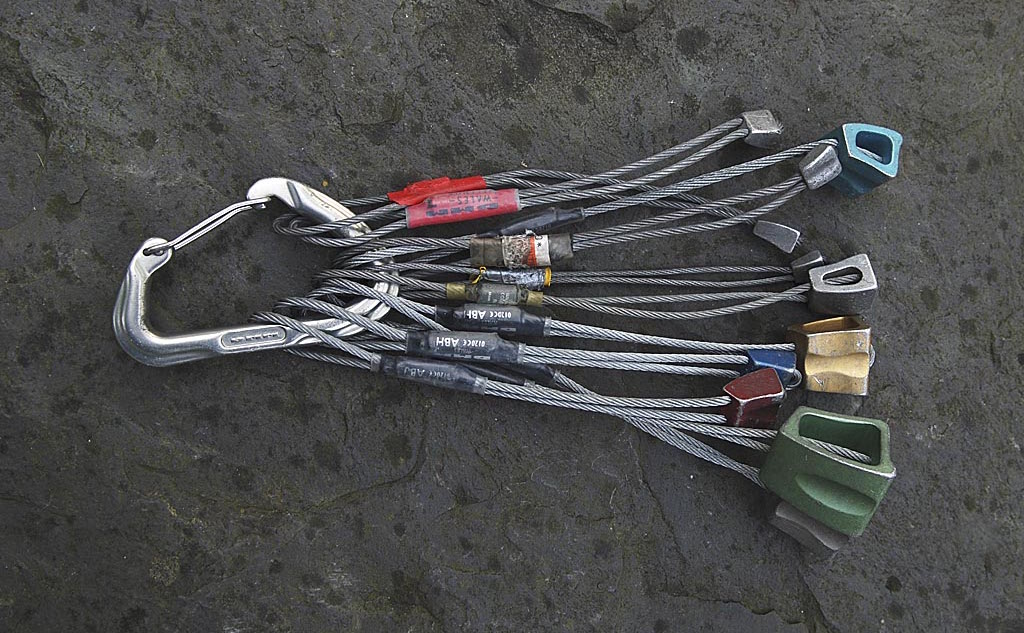
You could switch one of the size 10 wires for a size 11, giving you something slightly bigger. Wires now go all the way up to size 14, but you might have those sizes already covered by other large gear like hexes or cams
If you are going to have a double set of wires it is better to have one set of wires from one manufacturer and the other set of wires from another company. The sizes will be slightly different, giving you a wider range of placements.

How you rack these on your harness is up to you, but stay organised. Some people go for all the wires on one side or split small wires on one side, large on the other.
Sometimes the route might require microwires or RP. These tiny nuts are the extreme end of protection with many only offering marginal protection due to there size. Often these are places in large numbers so that if some break one may well hold your weight!
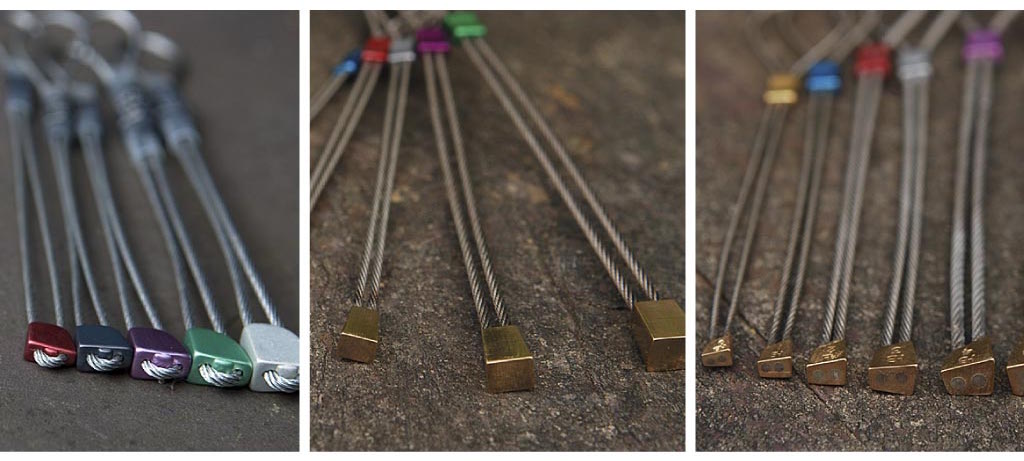
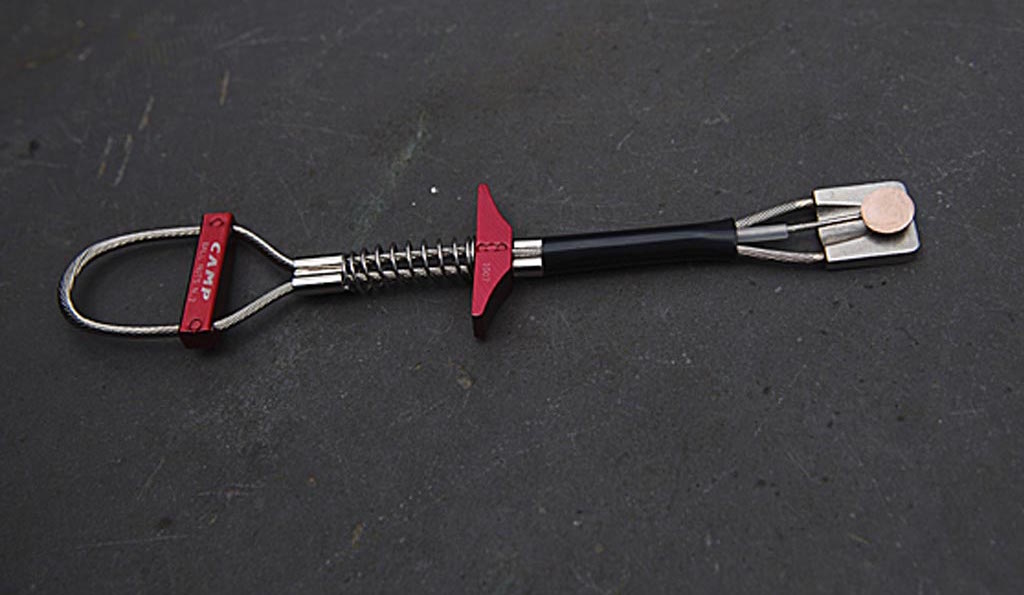
There is also a more specialist nut, called a slider, these are often good in very small, almost parallel-sided cracks. Seldom used, often on routes where it is known to be the only available runner, as such it is mentioned only for completeness.
Hexes
The best way to buy hexes today is on spectra, it means that at a push you can clip the rope straight into the gear without a quickdraw. For this, you will need one karabiner for each hex. If you double or triple up hexes on one karabiner, they are guaranteed to get into a tangled mess right when you need them.
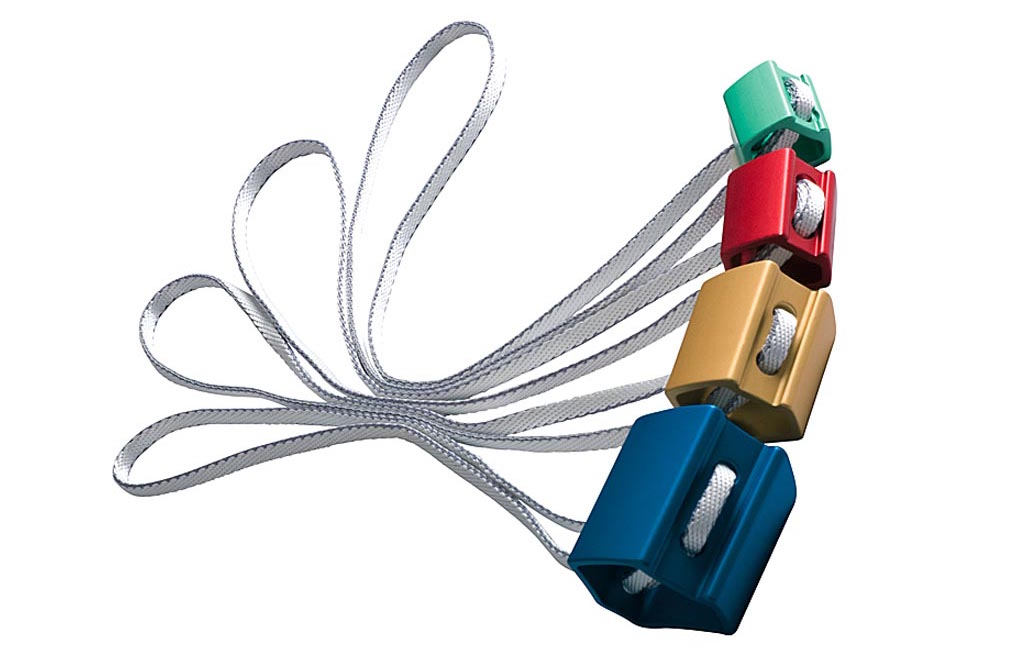
Choose your smallest hex bigger than your largest wire and choose two more hexes up to around a size 9 (three is a good quantity). Some people will carry more, others may carry none, preferring cams. Some rock types take hexes better than cams (e.g. some cracks on the sea cliffs at Gogarth, Wales are very irregular and take large hexes in natural taperings).
Another type of semi-passive large crack protection is the Tri-cam, they are also one of the only reliable pieces of gear for quarried shot holes. They’re a more specialist type of gear, mentioned for completeness as an alternative to hexes. A further alternative is the DMM torque nut.
Cams
The range of active camming devices seems unfathomable, but not as complicated as you might think. There are three different types of camming device; the original single solid stem, the single flexible stem and the double flexible stem, all have pro’s and cons but they all do the same job.
DMM Dragon Cams and a few other manufacturers now have two or more axles on their cams, giving them a greater range between being fully open and fully closed, one cam will fit a greater range of cracks but will weigh more. If you are only going to have a couple of cams on your rack, multi-axled models are a good idea.

Cams provide protection in places that would otherwise be protectionless and although they need to be placed with care, once mastered they can be placed very quickly. The invention of the ‘cam’ helped to push back the frontiers in traditional rock climbing. On long routes, alpine climbs or big walls you will see climbers carrying a very expensive skirt of such devices from the smallest to the very largest.
Manufacturers like DMM and Wild Country now make their range of cams in quarter sizes, meaning that you have the biggest selection of sizes. On long routes, where you may place a lot of gear, such as on mountain routes, sea cliffs or big walls, this option of having lots of gear can pay dividends. If you only took a few multi-axled cams because they have a greater size range you might end up with nothing left to place, whereas with a large number of quarter sized cams you may still have a reasonable range left to choose from. This and the doubled-over extension sling means that at a push you don’t need to extend the cam.

Which sizes should you take with you up a route? Look out for any wide cracks, or a route description or route name which suggests one. If it is all wide cracks do you need to take small cams? Starting out a new rack you should perhaps own sizes 1, 2 and 3 in camming devices if going for the more common single-axled cam. As your climbing develops you will notice what size cams would be most useful for the routes you are climbing.
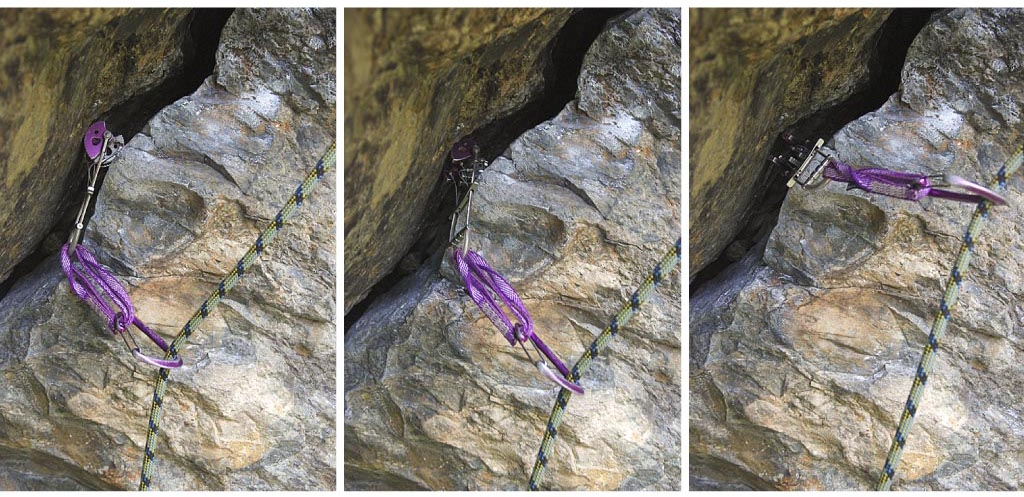
The most important thing to remember about cams is that they can walk out of the placement you put them in if the rope moves the stem. Modern twin-stemmed cams have a doubled over sling to extend them, but it is often prudent and sometimes essential to use a quickdraw as well to add another point of articulation and prevent this from happening.
Quickdraws and extenders
A deceptively simple piece of equipment, which is key to minimising rope drag. You’ll want to carry enough extenders of the right length up a route. This is often based on the length of the route, how much it wanders about, are there any roof, grooves or corners that you pass.
Sports climbing quickdraws generally have very short slings for bolted routes where all the bolts are drilled in a straight line to the top. But when it comes to trad routes, nature has seldom aligned all the gear placements. Therefore we need to take a good variety of longer length quickdraw with us of trad routes.

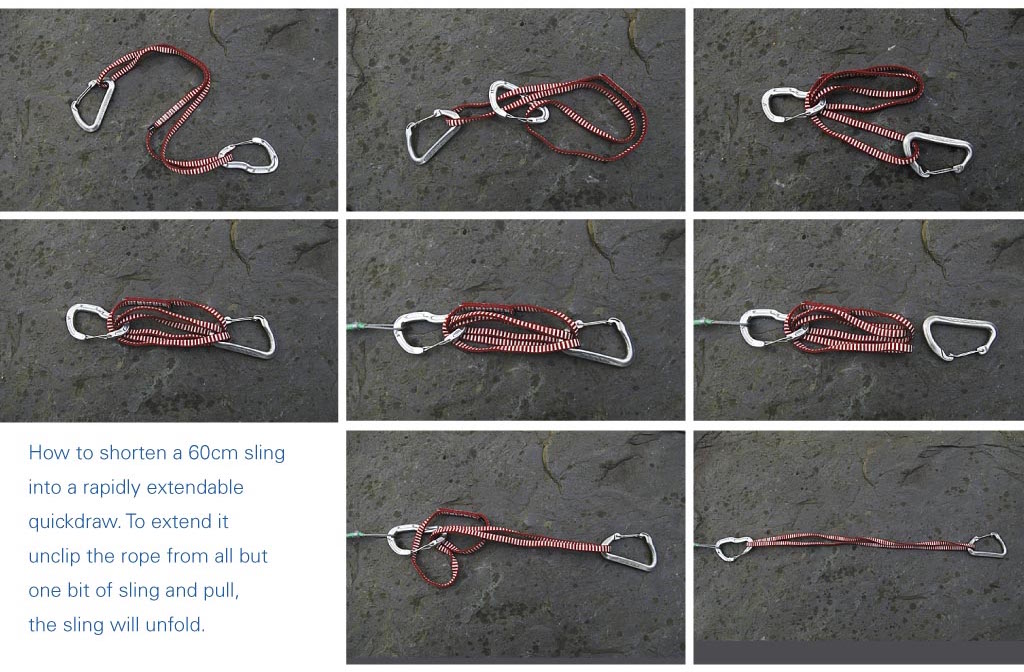
You will need a set of at least eight quickdraws to begin with, for short routes. Of those, you want some long (30cm), some medium (20cm) and a couple of short ones (15cm). It is also a good idea to have a 120cm sling and shortened as an extender like this below, often called an ‘alpine draw’.
Carry a variety of slings both 120cm and 240cm, so you can extend gear a very long way if needed or use them on spikes as you pass. Keep your 240cm slings over one shoulder and across your body, held in place with a screwgate (see below and your 120cm slings across the other shoulder to help prevent the slings tangling. Put your rucksack on before you shoulder your slings otherwise they will be stuck in the bag!

When it comes to racking your quickdraws adopt a system that works for you. Some people have gear on one side and quickdraws on the other. Many leading climbers (because of the amount of equipment they carry) spread them out over all the gear loops.
Something to hold the karabiner for clipping the rope in captive will help prevent it turning upside down (making it hard to clip). A bit of finger tape, an elastic band or castration ring can be used to captivate the karabiner. Some manufacturers quickdraws have a stitched through retainer to hold the karabiner at one end.
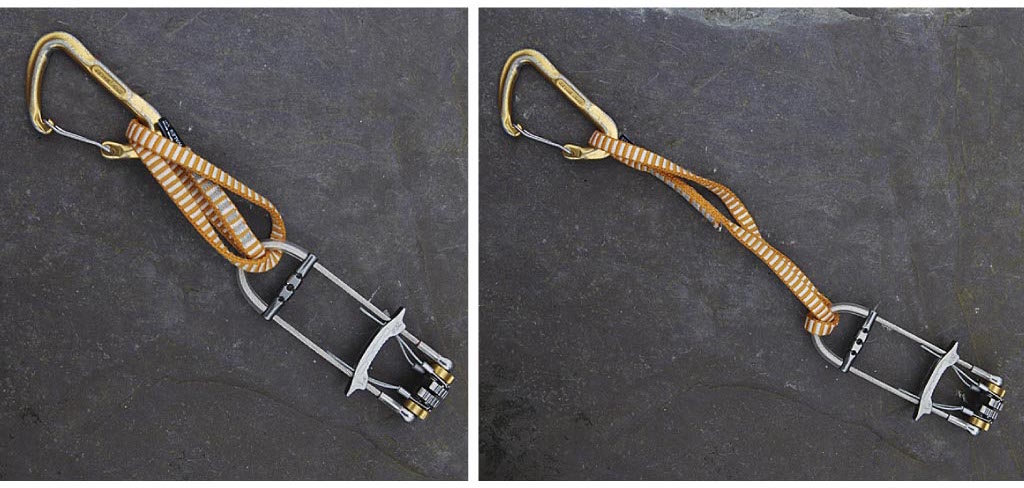
Warning – If you use a slings as a quickdraw with an elastic band or similar to captivate one end, beware that if it gets tangled up in your bag and the sling clips itself through the karabiner (A), then there is a danger that when you untangle it the sling will look OK, from one side (B), but is actually only held on by an elastic band. Check each quickdraw as you rack up.
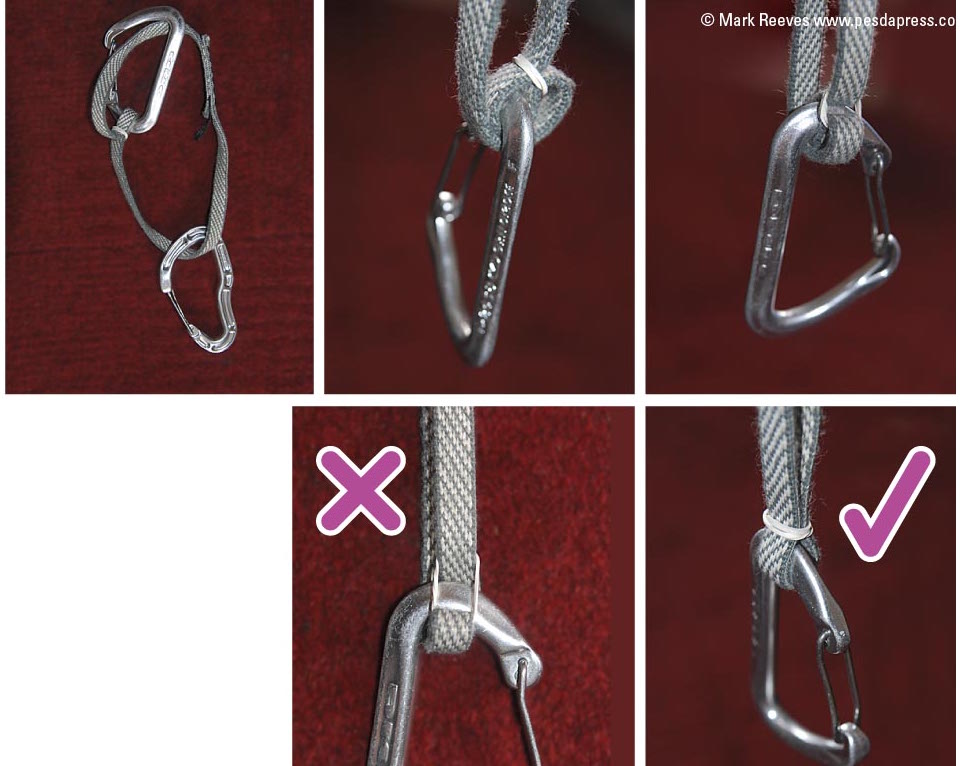
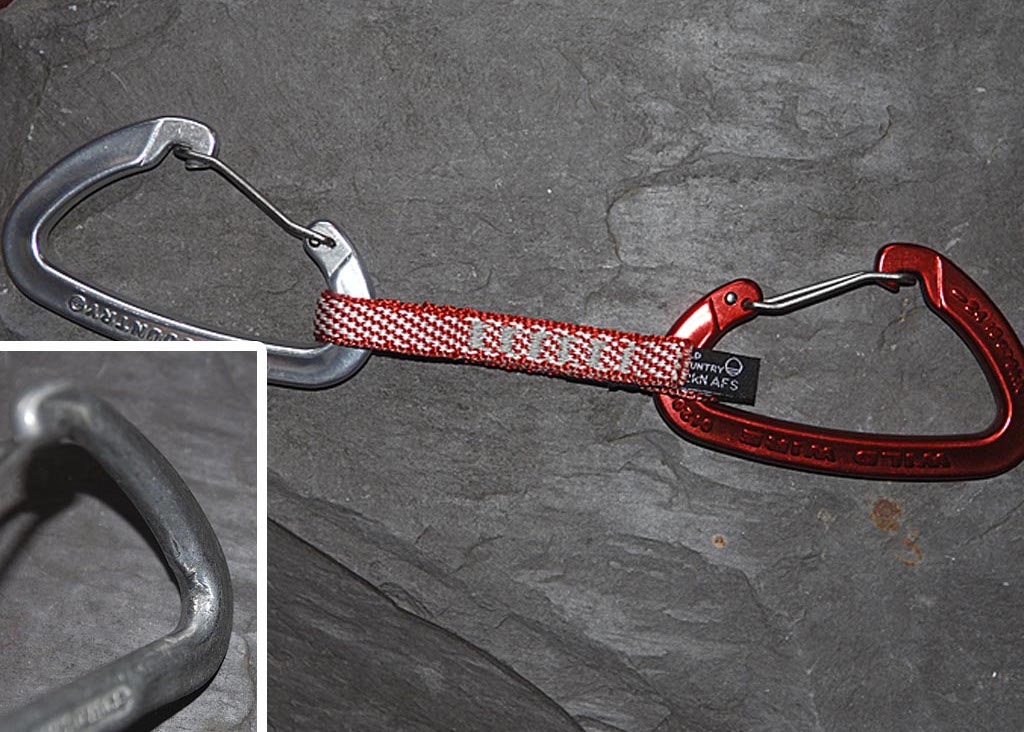
By having one karabiner clearly defined as for the rope means that if you were to go sports climbing and take a few falls the karabiner that has been attached to bolt may well suffer from dinks leaving potentially sharp edges. If you were to clip this damaged karabiner to the rope and fall you will probably damage your rope.
A tweak you may find useful, where making a move up to reach a bolt is too tenuous, is to make a ‘gripper clipper’. With some tape and your hold cleaning toothbrush you can create one mini clip-stick to add to your rack. An improvised mini clip stick – the gripper clipper, if you need to stretch to clip in situ gear, one of these can be a godsend. Some people now carry a longer (up to 6m) clip-stick around with them; for clipping the bolts on a sports route, placing a first wire or brushing holds which are out of reach.

Lead Climbing Coach Course
The author of How To Climb Harder runs trad climbing coaching courses in across the UK, North Wales and Spain via the sister site Snowdonia Mountain Guides. On our lead climbing coaching we cover fully racking up for trad lead climbing, we also have a fantastic array of gear for you to try before you buy anything.
eMailus to find out more.