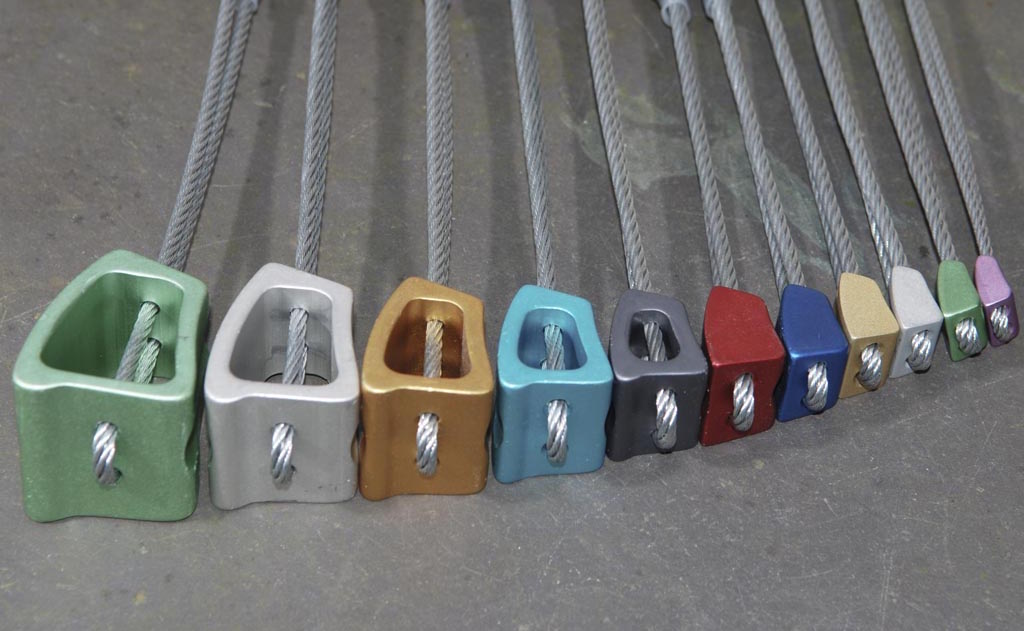
Nuts, Rocks and Wires stem from the original running belay placement for cracks were simply small pebbles, rocks or stones placed by climber as chockstones and threaded with a sling; over time climbers started to drill out machine nuts and use them instead. In modern days various companies make a variety of different shaped and sized wedges. They work by being placed in natural constrictions in cracks, wedging themselves in. The constriction stops the nut from being pulled through. When placing a nut you need to consider several things:
Quality of the rock
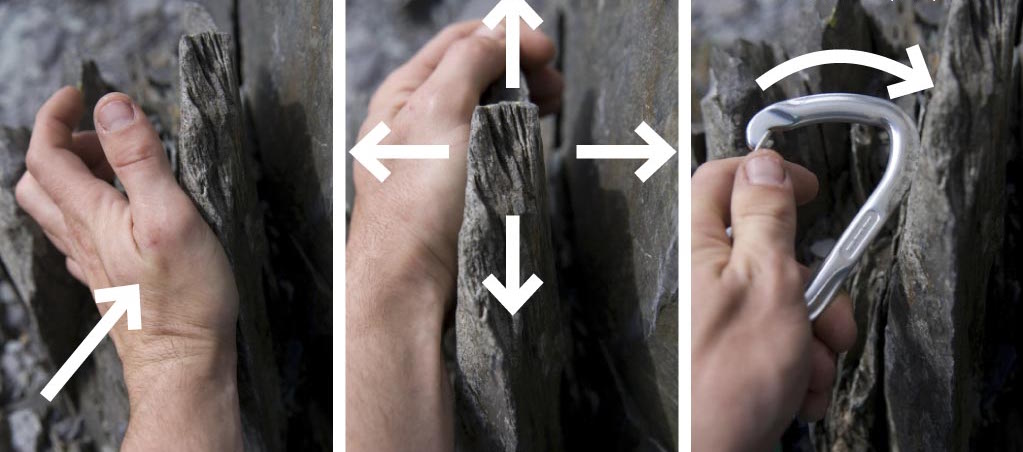
Avoid using loose or hollow sounding rock, along with superficial flakes. Check the rock by tapping it with a karabiner, a hollow sound will indicate poorer quality. If it is a flake try moving it by giving it a good shake, or hitting the flake with the palm of one hand whilst feeling for vibrations with the other. However you check the rock remember that you are at the top of a cliff and possible unroped, there is the possibility of people being below, so take care not to send anything over the edge of the cliff, especially yourself.
Natural constriction
To select a good nut placement, you rst need to identify cracks in line with the route you are climbing. You then need to nd a natural constriction in that crack where a nut can be wedged in, and won’t pull through. There may be signs of smoothing/wear and tear on popular climbs, often but not always an indication of a good placement.
Contact area
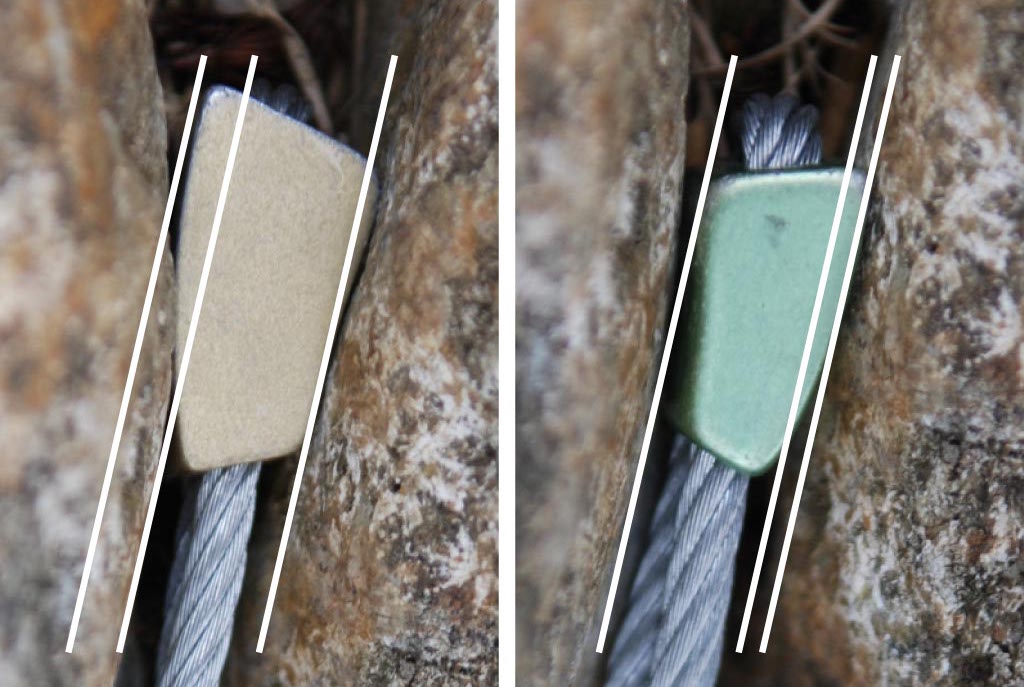
When the nut is securely wedged in the crack the greater the surface area of the nut in contact with the rock the better the placement.Try or simple turning the wire round or a different sized wire.
Overlap
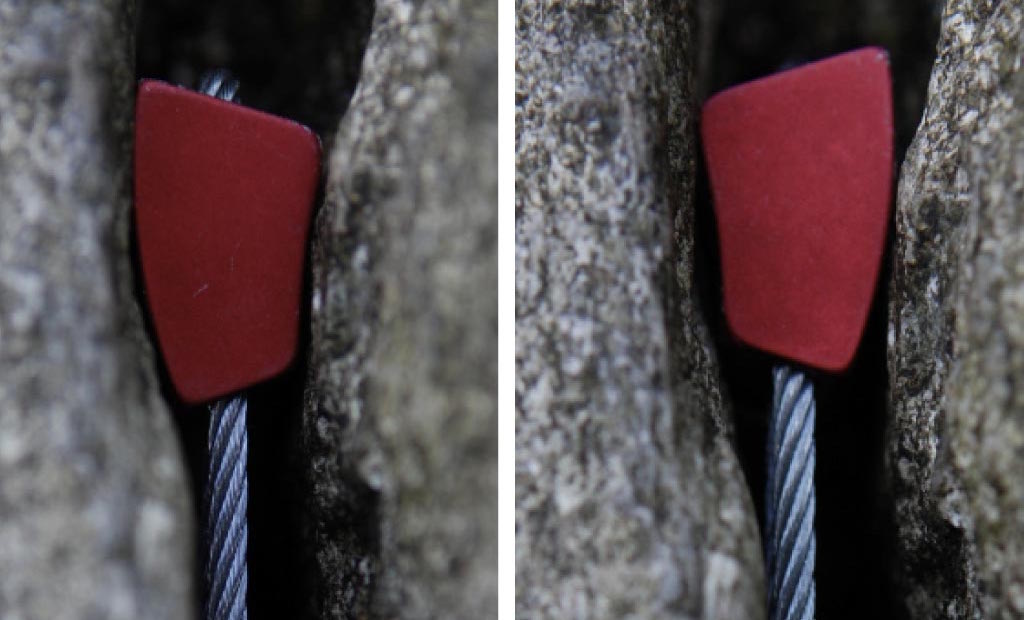
When the nut is securely in place there need to be a reasonable overlap between the width of the crack and the width of the nut. The reason for this is that if there is an extreme load on the placement it may simply pull the nut through the placement.
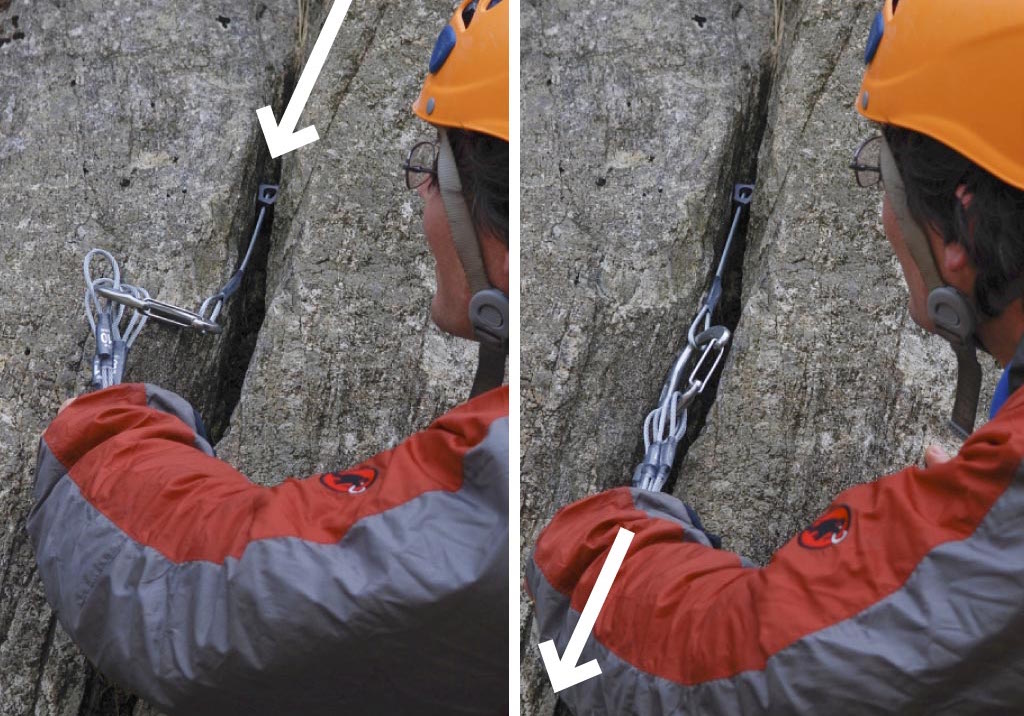
Seating
Does the gear stay put when left alone? First you must seat the nut securely. Use the other wires on you rack of wires as a grip and creating a shock load by jerking in the direction of pull on the wire. The nut will probably move slightly in the placement and hopefully drop into a snug fit. Then, if you lightly wiggle the wire you will see if it unseats itself from the placement, a well-seated nut will stay secure. Try not to over-do this, as you may end up with yout gear stuck in the crack, impossible to remove.
Get into the habit of jerking the wires into place to seat your wires as if the wire pulls through when you jerk it, only your arm moves. If you pull with your bodyweight to seat a wire and the placement fails, you will fall away from the rock with it!

Intro To Trad Climbing Course
Our intro to trad climbing course are a great way to get to know loads about basic trad belays and placing gear. You’ll also get a load of chance to place gear and make belays yourself under the watchful eye of our coaches, before you belay off them.
We will also teach you all you need to know to leave the course ready to trad lead climb on your own.
eMail us to find out more.